I have written before about my Diabetes Day Pack and What to Pack When Travelling on a Plane. A lot of this is now contained in my Bug-Out Bag which acts as a Day Pack (when I go to the office, work on site etc.) as well as a Carry-On bag for flights.

Why a Bug-Out Bag?
Before I had my diabetes bag which was exclusively for diabetes stuff but the new bag combines work gear as well. This makes sense for me as the main reason for leaving the house during the week is work and it is also the main reason why I fly interstate. Whereas before this would mean hauling two bags with me (a laptop/work bag and my diabetes bag) this is now all in one. It also makes spontaneous travel a lot easier as I simply pick up the bag and I am good to go.
The Anatomy of my Bug-Out Bag
The key elements are:
- Large enough to fit all your stuff in but small enough to slide under the seat in front of you when on the plane. My bag is at the upper limit for under seat storage
- Two sections: one for work and one for diabetes stuff. This makes life a lot easier when finding things and, if the airline takes exception to the weight of the bag, it is easy to find the ‘medical supplies’ for weight exemption or for moving them into your check-in bags (with the possible exception of insulin and other essential supplies)
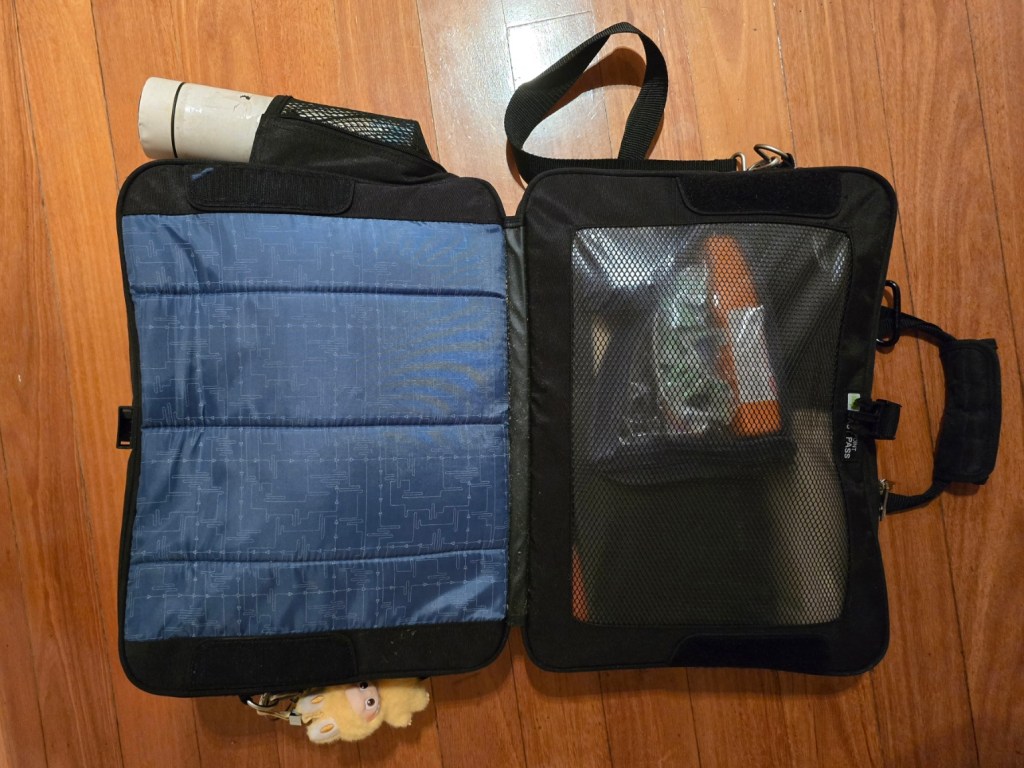
A nice feature of this particular bag is it folds out into two parts and has a transparent window on one of them. This is useful for showing needles and other ‘restricted’ items although I rarely have to use it.
Contents of the Bug-Out Bag
I will break it down into three areas:
- Work area: Laptop, papers, power bank, cables etc., the usual stuff a tech professional carries around
- Side pouches: Small pockets on the front which I will go through in detail below
- Diabetes area: Where the diabetes stuff is which I will also go through below
Side Pouches
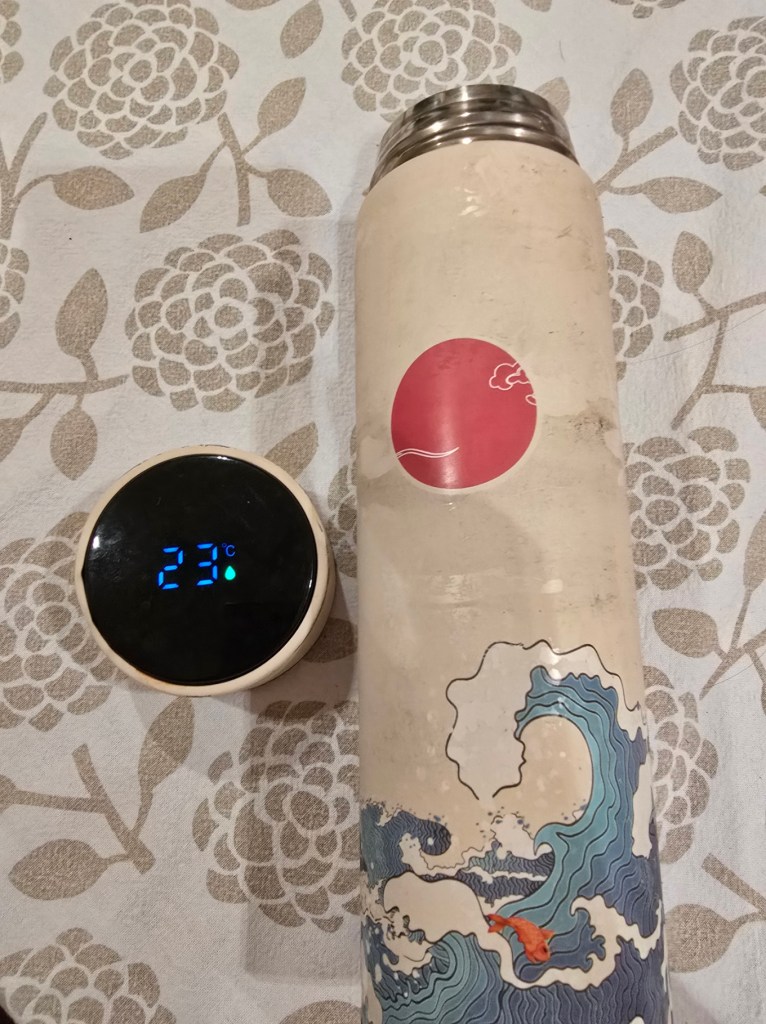
As can be seen in the photo, I have a water bottle on the side of the bag. Always useful when at the airport gate and for making cold brew tea in hotel rooms but, in this case, it is also useful as an insulin case, if needed. Not only is the bottle insulated but it has a temperature gauge on the top. Fill it with fridge water, put your insulin reservoirs/vials in a ziplok and you can store them in there for literally hours in any weather and they will be completely safe. I picked this one up on Temu a few years ago for A$15 and it has served me well ever since.
My first zippered side pouch has the following items.
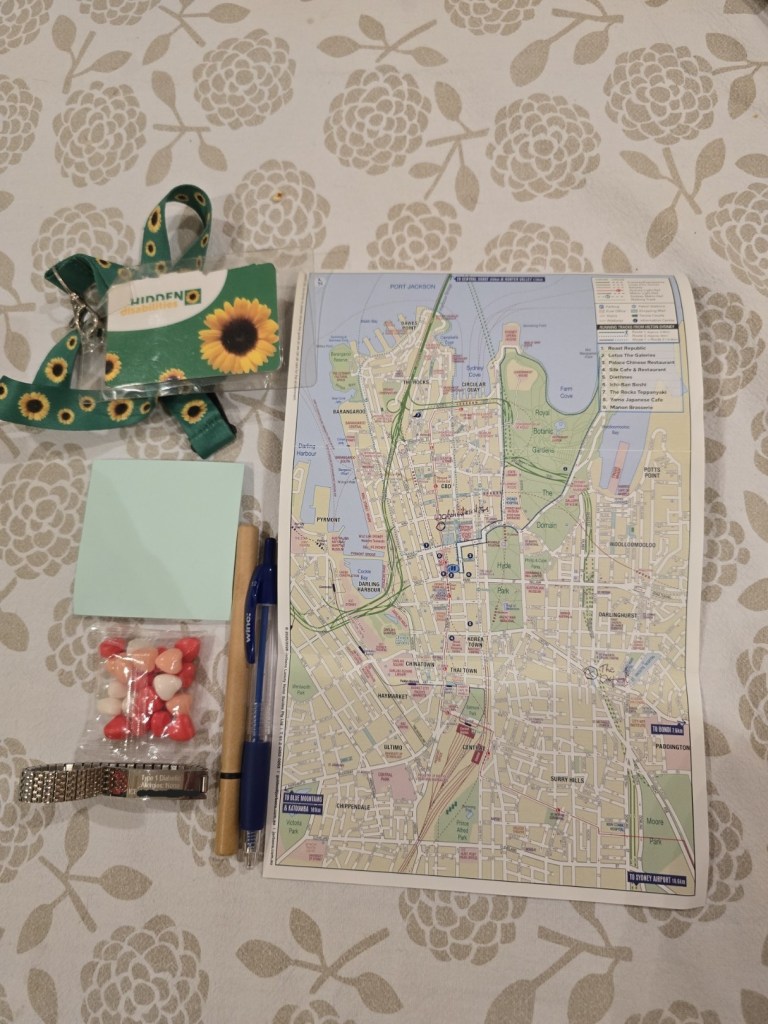
Here we see:
- Hypo-candy
- Post-It notes and pens: Always useful and you can make origami out of the square Post-Its when bored at the gate to entertain fellow passengers. Always have at least two pens so if one runs out you have a backup. Although it is becoming increasingly rare, if you need to fill out forms or arrival or departure, black ink is your safest option.
- A map of the local city: These can be picked up for free at most hotels and, for me, are super useful. I used to carry interstate maps for excellent cocktail bars but, as they come and go quite frequently, I find Google Maps to be more reliable these days. I use this map for places in the city where I can work between meetings. It is a relatively new map so not many places yet. You could also use it for public toilets, chemists/pharmacies, medical centres etc.
- Sunflower lanyard: Not very useful day-to-day but I always wear it at the airport. While it confers no inherent perks or privileges, it does indicate to staff you may take a little longer going through screening (I always request a pat-down as my pump is not certified for the scanners) and may have individual needs boarding. Wearing the lanyard has given me access to the priority queue for security and priority boarding in multiple countries. Priority boarding is useful when I have two carry-on items and want them nearby in flight. Sunflower lanyards can be picked up at participating airports/train stations/malls so check online for somewhere near you (https://hdsunflower.com/find-the-sunflower). In my experience though they are often out of stock. You can pick them up on Temu/Aliexpress/Shein for less than A$5 or from Amazon for A$10 or so.
- Medi-bracelet: I do not often wear this but, if travelling in countries where my language skills are not strong, I sometimes put it on. In this case, it has my disease, my allergies and a contact “In Case of Emergencies”. This one I picked up on AliExpress, including engraving, for A$9.
In my second side pouch I have:
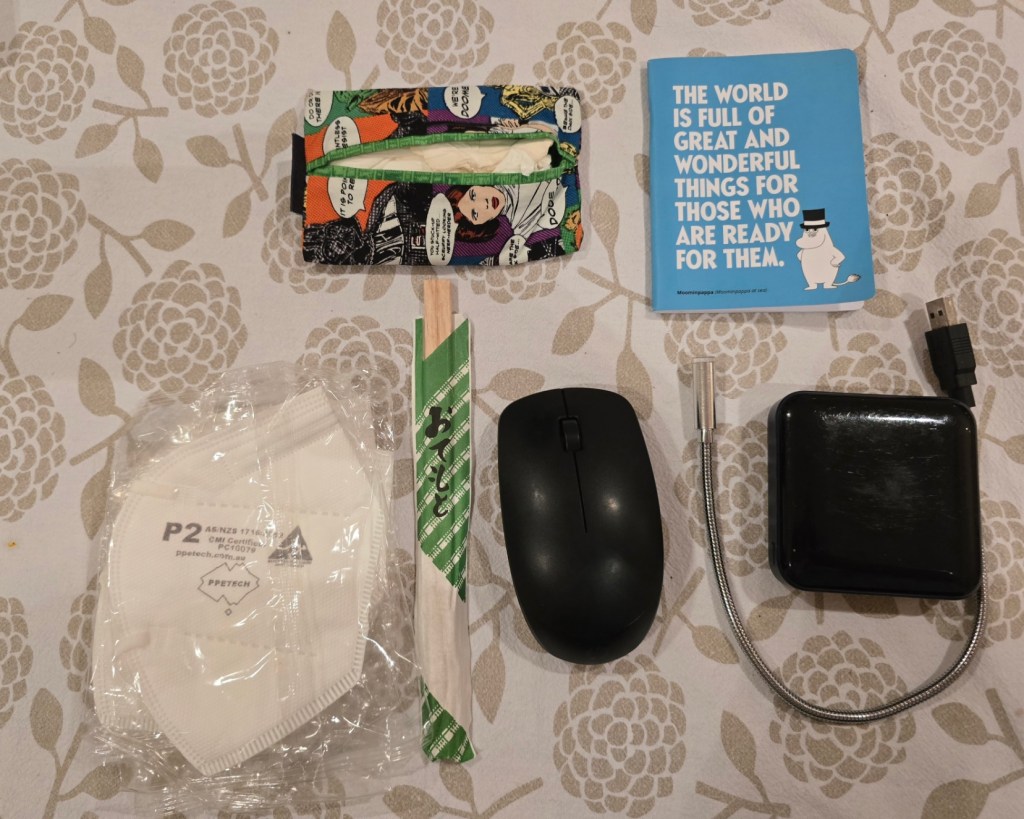
- A pack of tissues (always useful for spills, blowing nose etc.)
- A notepad with sage advice from Moominpappa
- N90/P2 facemasks which I still wear on flights because people are animals and I enjoy not being sick when travelling.
- Chopsticks: Emergency cutlery
- Computer mouse
- USB light: Very handy when changing pump sets in economy with the cabin lights off
- Small powerbank: Easy to carry in a pocket and useful to keep the phone going in emergencies or for the USB light
Diabetes Section
That side section carries a lot of stuff with some of it in its own sub-containers for convenience.
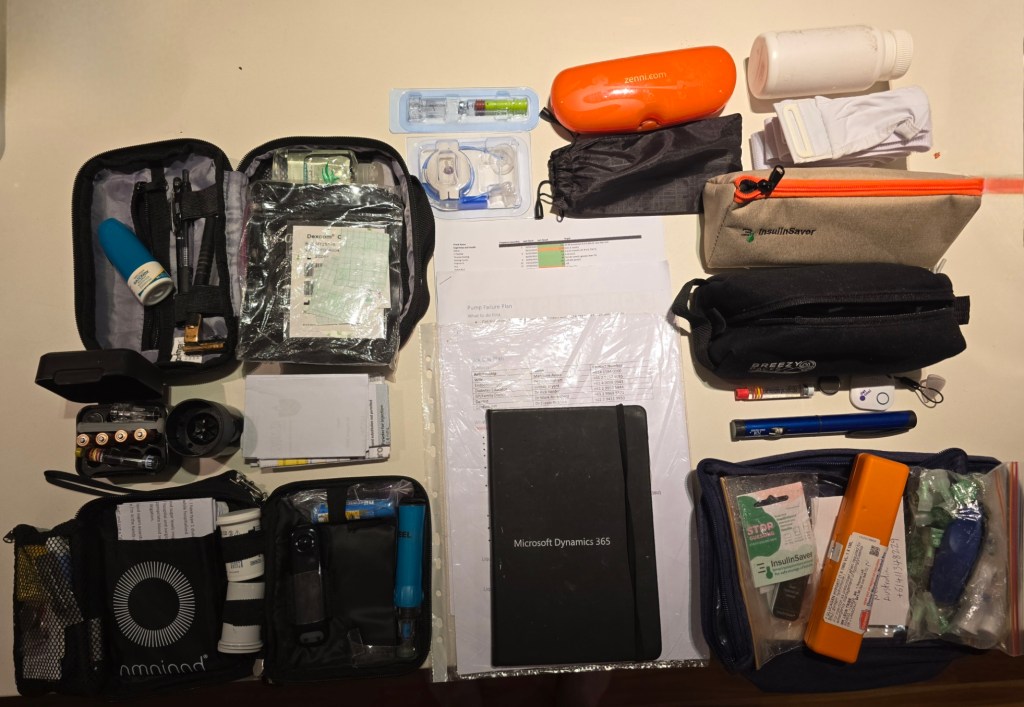
We have:
- My pump/CGM changing kit which contains
- Nasonex spray which can be helpful if skin gets irritated by the adhesives
- Pens and notebook: For capturing instructions for set changing procedures, passwords etc.
- Safety razor: For deforesting a space to attach the cannula or CGM
- Opsite patches: This is my current solution to the cannula adhesive. Basically, when I take a cannula off, I cover the site with Opsite. This does not relieve the itching/irritation but stops me damaging my skin when scratching the site. The irritation usually settles down after a day or two and I simply remove the patch. Opsite is a breathable plastic film which can be purchased at major chemists/pharmacies
- Alcohol wipes: Used for wiping reservoirs/cartridges and skin when applying cannulas/CGMs
- CGM Patches
- Hand sanitising gel: For when I need to change my set but I do not have easy access to soap and water
- AAA batteries: For my pump
- Other bits for my set such as insulin transfer collar, cannula applicator etc.
- MDI backup kit which contains
- Prescriptions
- Business cards of my health care team
- A letter from my endo stating my pump and CGM cannot go through airport security
- The slightly modified Bernstein pro-forma hospital admission letter advocating I continue to manage my levels in hospital and any saline bags used do not contain glucose or similar
- Printouts of online web sites stating my devices cannot go through airport security scanners
- Endo letter confirming I carry needles, insulin, juice etc. as a person with type 1 diabetes
- Blood glucose meter and strips
- Genteel pricker: If you still do finger pricks regularly, spend the money and get a Genteel. They are fantastic. Painless pricking, anywhere on your body, not just the fingertips
- Splenda sweetener tabs for sugarless sweetening of foods
- Ketone meter and strips
- Spare CR2032 (glucose/ketone meters) and AAA batteries (pump)
- Spare lancets which will never be used
- Lip balm for travelling
- Sick Day Plan
- Pump Failure Plan
- A copy of my latest bloodwork
- Spare pump consumables (the Dexcom G6 applicator is quite bulky otherwise it would also be in there)
- Spare prescription glasses
- A small sharps container for travelling (I use an old vitamin bottle)
- Spare pump belt (I usually wear one and wash one so a spare means I can do this in the hotel room sink)
- Insulin Saver Bag and Breezy Pack for keeping insulin at temperature when travelling
- A cartridge of rapid insulin which I rotate out as I refill my pump (room temperature insulin is less likely to cause lipohypertrophy apparently
- Dot cool Bluetooth temperature monitor (I am not sure if there are still available but it is a great little temperature monitor)
- Novopen 4 in case I need to MDI my Fiasp cartridges instead of feeding them into my pump
- Glucagon pen
- InsulinSaver Temperature monitor: A one-use temperature monitor which I got as a freebie at ATTD and keep in the bag although I have never used them
- Needles and needle clipper
- A piece of paper with my name, postal address and phone number on it in case I ever lose the bag
It may seem like a lot of carry but it means I can pick up my bag and go anywhere and I will not need anything for, say, a week. No stressing, no last-minute packing, and ready for work or when I am heading to the airport.


